ADMINISTRATOR USER GUIDE
3. System Settings
3.1 Database Information
3.2 Search Settings
3.3 Ontology Settings
3.4 Association Statistics
3.5 Watch Dog
4. Listing
the Items Option
5. Users
5.1 User Summary
5.1.1
Assign/Delete User Roles
5.2 Change a Password
5.3 Create a User
5.4 View/Create Roles
6.1 Category Summary
6.2 Create
7. Articles
7.1 Articles Summary
7.2 Create
8. Forums
8.1 Forums Summary
8.1.1 Content
8.2 Create
9. Pollings
9.1Pollings Summary
9.1.1 Questions
Create a New Question
Edit Question Properties
Remove a Question
9.1.2 Results
9.2 Create a Polling
10. Messages
10.1 Messages Summary
10.2 Send a Message
11. Submissions
11.1 Submissions Summary
11.2 Remove
12. Forms
12.1 Forms Summary
12.1.1 Show Form
12.2 Create a New Form
13. Web Resources
13.1Web Resources Summary
13.2 Create
14. Tenders
14.1 Tenders Summary
14.1.1 Award
14.1.2 Close
14.2 Create
15. Remove: User, Article, Forum, Polling, Message, Submission, Web Link, Tender
16. Edit: User, Article, Forum, Polling, Form, Web Link
17. Associations: Categories, Articles, Pollings, Forms, Web Resources, Tenders
18. Permissions: Articles, Pollings, Forms, Web Resources, Tenders
19. Logout
1. INTRODUCTION
Click on one of the links from the navigation menu (on the left) to scroll down to the more detailed documentation that is available below.
The following user guide is aimed at three users:
- the system administrator - can view all of the system and
create the ontology.
- discussion forum moderator - can only view the discussion
forums.
- system publisher - can publish forums, pollings and articles.
The discussion forum moderator can only view the forum details.
The system publisher publishes the Articles, Forums, Pollings, Messaging, Submissions, Forms, Web Links and Tenders.
2. LOAD UP HOME PAGE
(a) From your Desktop double click on your web browser icon for example Mozilla or Internet Explorer (see Figure 2.1). If the icon is not on your desktop look for the icon through your Start menu.
(Throughout this user guide the Mozilla browser will be used).

Figure 2.1 Mozilla and Internet Explorer icons
(b) In the Address Bar (Figure
2.2) type in: www.wolforum.org/webocracy/admin.
(c) Press the ENTER key or click on .
.

Figure 2.2 Mozilla's Address Bar
(c) Press the ENTER key or click on

Figure 2.2 Mozilla's Address Bar
The Admin login box is displayed
(see Figure 2.3).
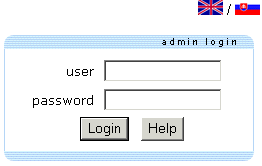
Figure 2.3 Admin Login Box

Figure 2.3 Admin Login Box
(d) Enter your username and
password.
(e) Click on .
.
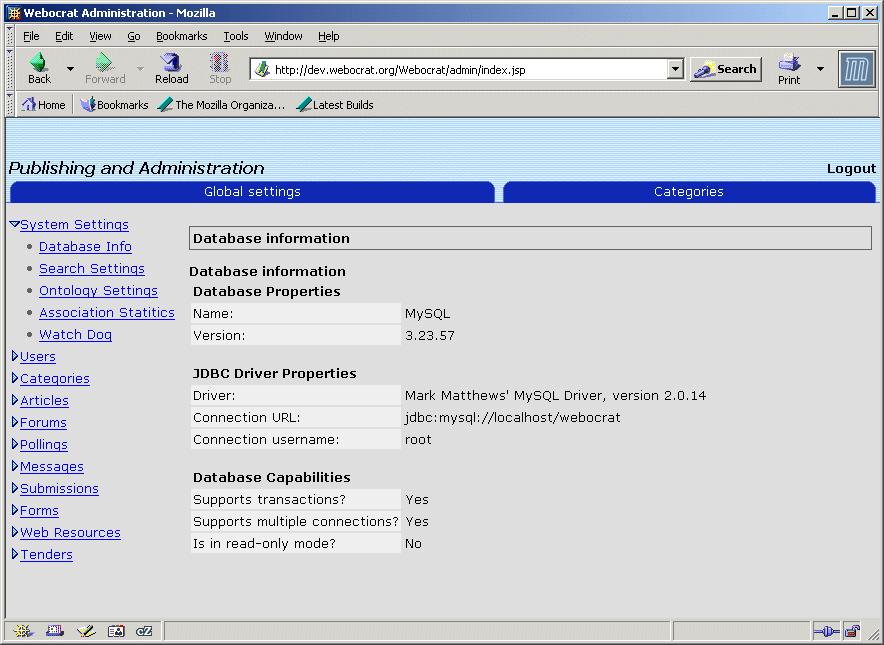
The system administration homepage is displayed (see Figure 2.4).
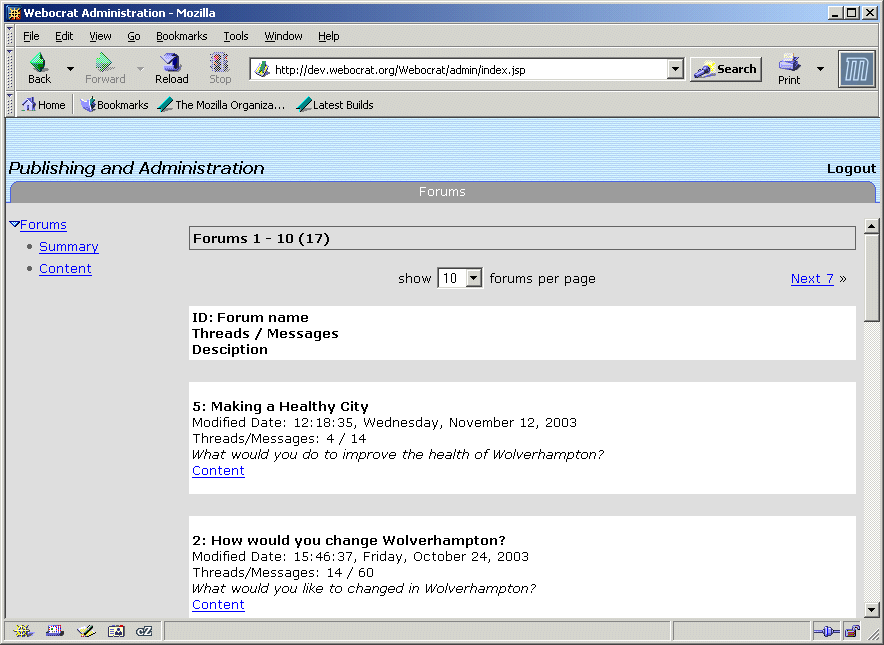
The discussion forum moderator homepage is displayed in Figure 2.5. The discussion forum topics are displayed.
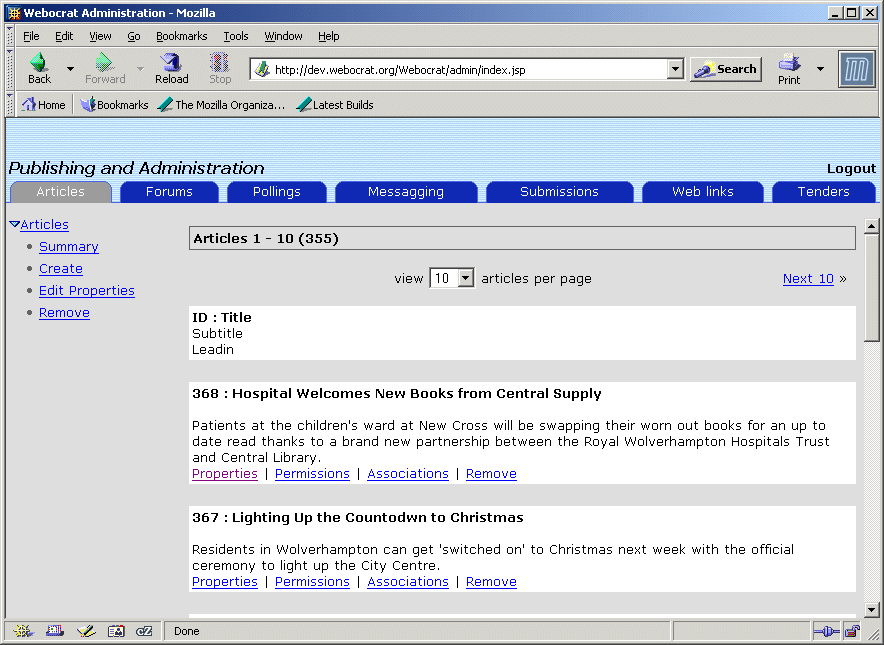
The system publisher homepage is displayed in Figure 2.6.
Across the top of the homepage are two tabs labelled as: Global Settings and Categories. The homepage automatically displays the Global Settings folder.
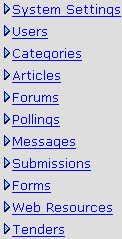
The Global Settings tab contains eleven main category links which are displayed down the left hand side of the homepage and are labelled as: System Settings, Users, Categories, Articles, Forums, Pollings, Messages, Submissions, Forms, Web Resources and Tenders.
The Categories tab (across the top of the homepage) and the Categories link (down the left hand side of the homepage) display identical information.
Across the top of the publisher homepage are seven tabs labelled as: Articles, Forums, Pollings, Messaging, Submissions, Web Links and Tenders.
Sections 3, 5 and 6 apply to the system administrator only.

3. SYSTEM SETTINGS (SYSTEM ADMINISTRATOR)
(a) If not already displayed click on the Global Settings tab.
(b) Click on System Settings (see Figure 3.1).
3.1 Database Information
(a) Click on the Database Info link (see Figure 3.2) (unless it is already displayed).
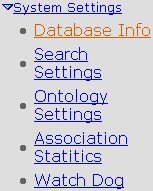
The Database Info page holds information about the database consisting of its properties (Name and Version), the JDBC Driver Properties (Driver, Connection, URL and Connection username) and the database capabilities.

3.2 Search Settings
(a) Click on the System Settings link.
(b) Click on the Search Settings link (see Figure 3.3).
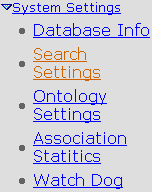
The Search Settings page adds new resources into the searchable resource database. How often this takes place can be controlled by adjusting the refresh interval and clicking on the UPDATE button.

3.3 Ontology Settings
(a) Click on the System Settings link.
(b) Click on the Ontology Settings link (see Figure 3.4).
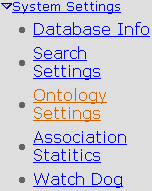
The Ontology Settings page controls how often the ontology reloads from the ontology server. This can be controlled by adjusting the refresh interval and clicking on UPDATE.
To reload the ontology from the server click on .
.

3.4 Association Statistics
(a) Click on the System Settings link.
(b) Click on the Association Statistics link (see Figure 3.5).
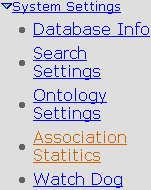
This shows all the themes and indicates the number of documents linked to each theme.

3.5 Watch Dog
(a) Click on the Systems Settings link.
(b) Click on the Watch Dog link (see Figure 3.6).
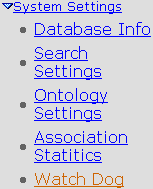
This is responsible for updating the submission processing states and handles any new replies.

4. LISTING THE ITEMS OPTION
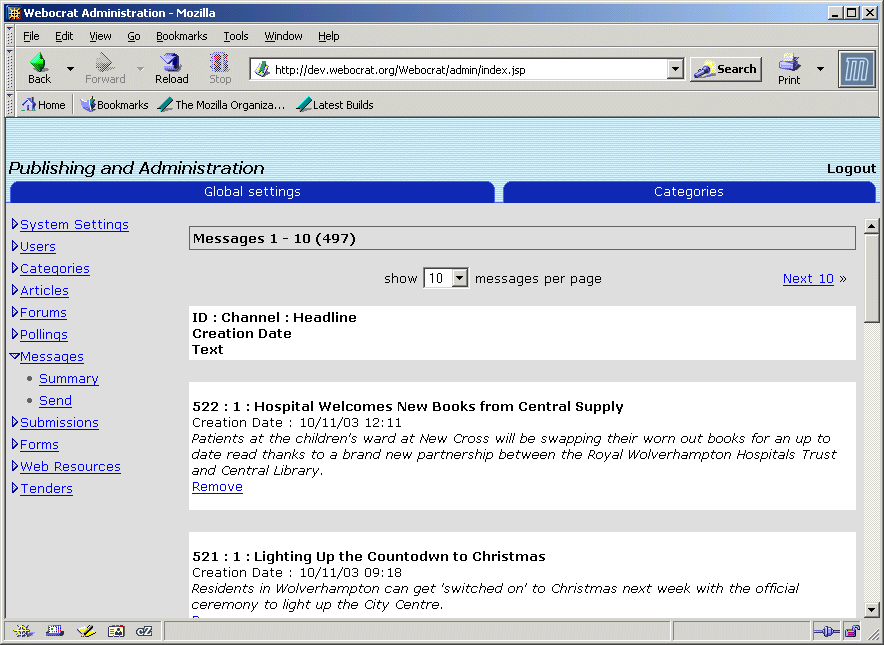
When clicking on the Users, Categories, Articles, Forums, Pollings, Messages, Forms, Web Resources or Tenders link there is an option available (see Figure 4.1) which allows you to decide how many User's for example can be viewed per page.

(a) Click on and a list becomes
available (see Figure 4.2). This comprises of a list of options, which
allows you to decide how many items (i.e. Users, Categories, Articles,
Forums, Pollings, Messages, Forms, Web Resources and Tenders) can be
viewed per page. The options available are: 10, 20, 30 and 50.

(b) Click on the preferred number.
(c) Also on the right hand side of the screen there is a link labelled Next (see Figure 4.3). Click on this to view other items on the next page. Likewise when on the next page to go back to the previous page click on the Previous link (see Figure 4.4).


5. USERS (SYSTEM ADMINISTRATOR)
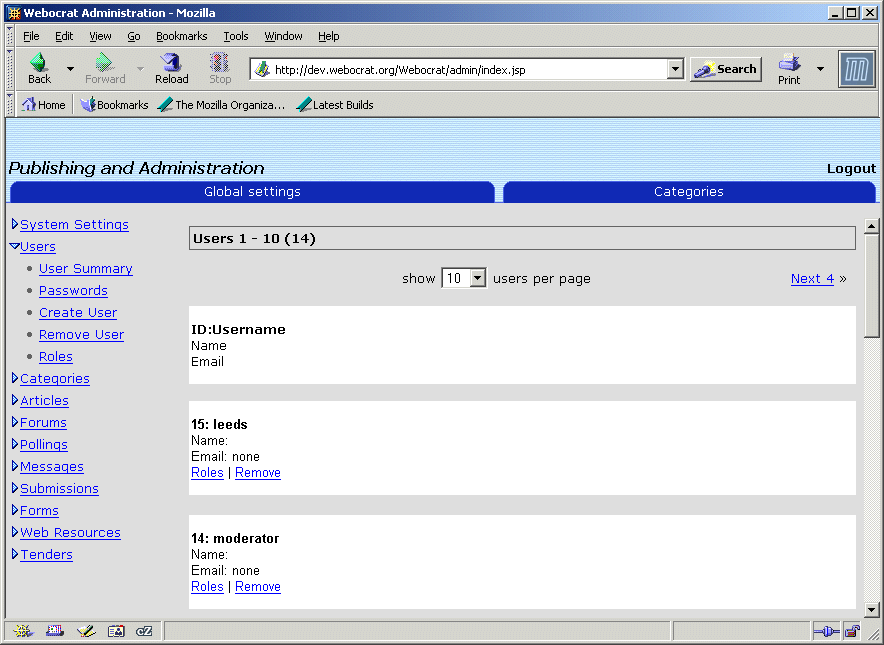
(a) Click on the Users link (see Figure 3.1). The User Summary page is displayed (see Figure 5.1).
5.1 User Summary
The User Summary page displays the User's ID, Name and their Email address. The summary page also contains two links: Roles and Remove, which are explained in more detail in this section.
5.1.1 Assign/Delete User Roles
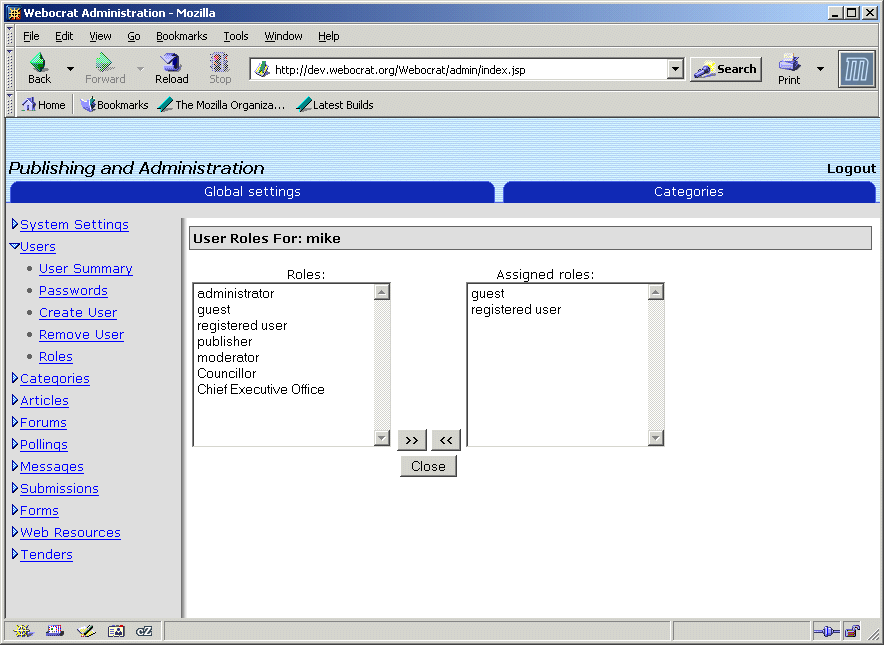
If you click on the Roles link below the users email address (see Figure 5.2) a page containing the roles for that particular user are shown. Displayed on this page are two boxes labelled as: Roles and Assigned Roles (see Figure 5.3).

The roles are: Administrator, Guest, Registered User, Publisher and Moderator.
If you wish to assign a new role for a particular user click on the desired role in the Roles box and click on .
.
If you wish to delete a role from a user click on the role you wish to delete in the Assigned Roles box and click on .
.
When the roles have been assigned correctly click on .
.

5.2 Change a Password
(a) Click on the Users link (see Figure 3.1).
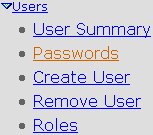
(b) Click on the Passwords link (see Figure 5.4).
The Change Password page is displayed and this is where the passwords can be changed.
(c) Enter the required information: admin password (i.e. current password), username of person to change, new password, and confirm new password in the appropriate input boxes.
(d) When all the above details have been entered click on .
.

5.3 Create a User
(a) Click on the Users link (see Figure 3.1).
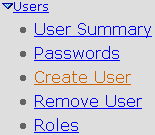
(b) Click on the Create User link (see Figure 5.5).
The page to create a user is displayed. Enter the following information in the relevant input boxes: First Name (optional), Last Name (optional), Email, Username and Password (to be entered two times).
(d) The username entered can be the email address entered. If this is the case click in the use email box else leave it blank.
(e) When all the above information has been entered click on .
.
(f) If the password no longer needs to be changed click on .
.
(g) When a User is created the roles Registered User and Guest are automatically assigned. To change these or add new roles go to Section 5.1.1.

5.4 View/Create Roles
(a) Click on the Users link (see Figure 3.1).
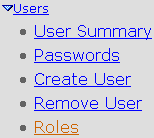
(b) Click on the Roles link (see Figure 5.6).
A list of the Roles is displayed consisting of the Roles Name and a Description.
(c) To create a role click on .
.
(d) The create roles page is displayed, here enter the new roles information in the relevant input boxes: Name and Description.
(e) When the above information has been entered click on .
.
(f) If the role no longer needs to be created click on .
.

6. CATEGORIES (SYSTEM ADMINISTRATOR)
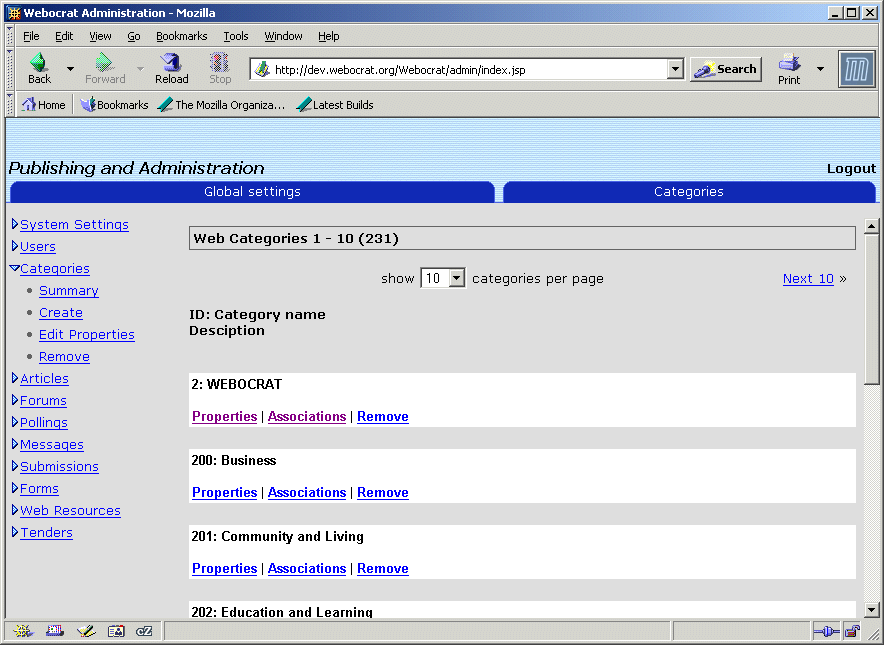
(a) Click on the Categories tab. Or click on the Categories link from the Global Settings tab (see Figure 3.1). The Web Categories page is displayed (see Figure 6.1).
The Web Categories page is displayed showing the Category name and below the name are three links: Properties, Associations and Remove.
6.1 Category Summary
When the Categories link or tab is selected the Category Summary page is displayed.
6.1.1 Remove (Go to Section 15)
6.1.2 Properties (Go to Section 16)
6.1.3 Association (Go to Section 17)
6.2 Create
(a) Click on the Categories link (see Figure 3.1).
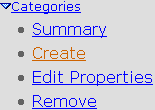
(b) Click on the Create link (see Figure 6.2).
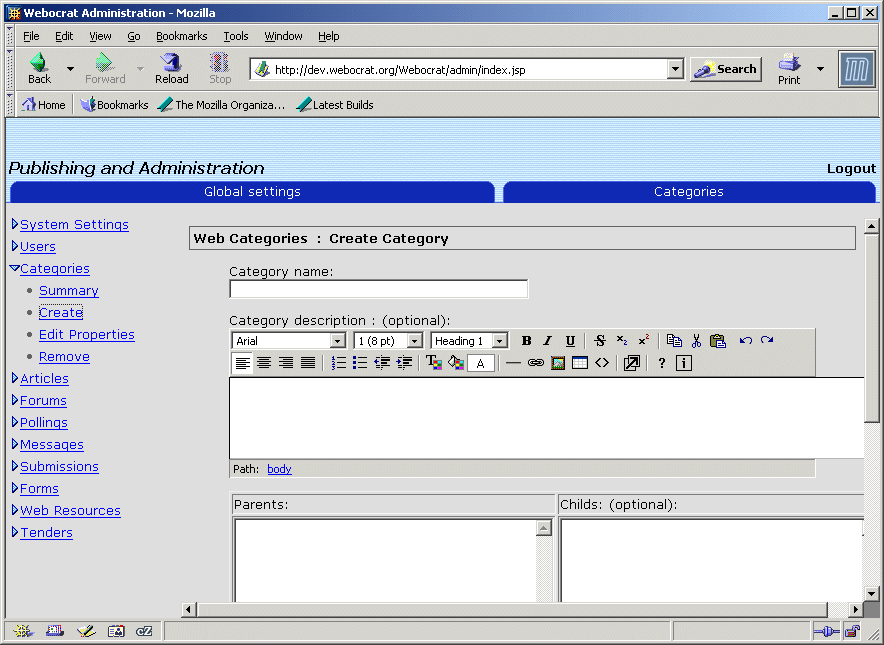
(c) The create category page is displayed (see Figure 6.3). To create a Category enter the following information: Category Name and the Category Description (optional). Above the Category Description input box is a text editor where the text style can be changed.
(d) Scroll down the page to the Choose Categories section. Decide which categories require to be added as a Parent and which ones as a Child.
(e) Once decided about the Parent and Child categories click on the category name. Depending on whether you want to add the category as a parent/child click on or
or  .
.
(f) If a parent or child needs to be removed from a category below the category description box are two more boxes. Click on the Parent or Child category that needs to be removed then click on .
.

7. ARTICLES
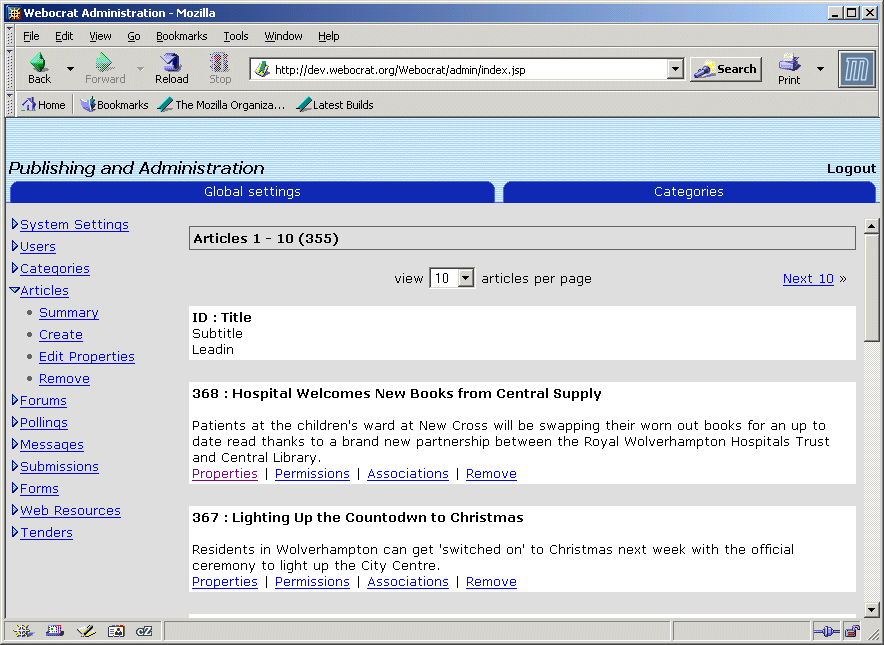
(a) Click on the Articles link or tab. If logged on as the system administrator the Articles summary page is displayed as in Figure 7.1 but the layout of the system publisher page is slightly different (see Figure 2.6).
The Articles summary page shows the Article Title, Subtitle and Leadin.
7.1.1 Remove (Go to Section 15)
7.1.2 Properties (Go to Section 16)
7.1.3 Association (Go to Section 17)
7.1.4 Permission (Go to Section 18)
7.2 Create
(a) Click on the Articles link or tab.
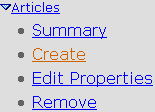
(b) Click on the Create link (see Figure 7.2).
(c) The Articles Create page is displayed. To create an Article the information that needs to be entered is: Title, Subtitle, Picturefile, Leadin, Article Body and Attachment file. The information for the items with an asterisk by their side must be entered.
If there are files you wish to attach to the article click on browse next to the attachementfile input box. Locate to where the file is and click on open.
Enter the above information.
(d) When all the above information has been entered click on .
.
(e) If you no longer need to create an Article click on .
.
(f) The Associations Link Resource page is now displayed. Go to Section 17.
(g) For Permissions go to Section 18.

8. FORUMS
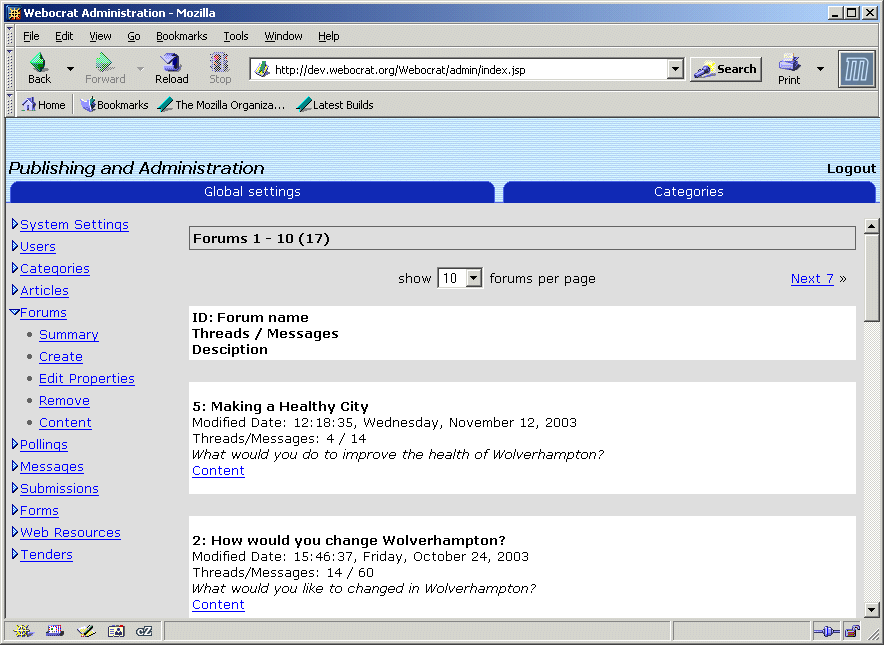
(a) Click on the Forums link or tab. If logged on as the system administrator the Forums summary page is displayed as in Figure 8.1 but the layout of the system publisher and the discussion forum moderator pages are slightly different (see Figure 2.5).
8.1 Forums Summary
The forum is where discussions on related topics take place. The Forum Summary page displays the Forum Name, Threads/Messages and the Description.
8.1.1 Content
(a) To view the content of a Forum click on the Content link below the forum you require from the Summary page (see Figure 8.2).

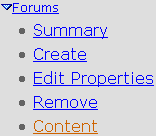
(b) Alternatively, click on the Content link (see Figure 8.3). Click on and select the forum you require
from the drop down menu list. Click on
  .
.
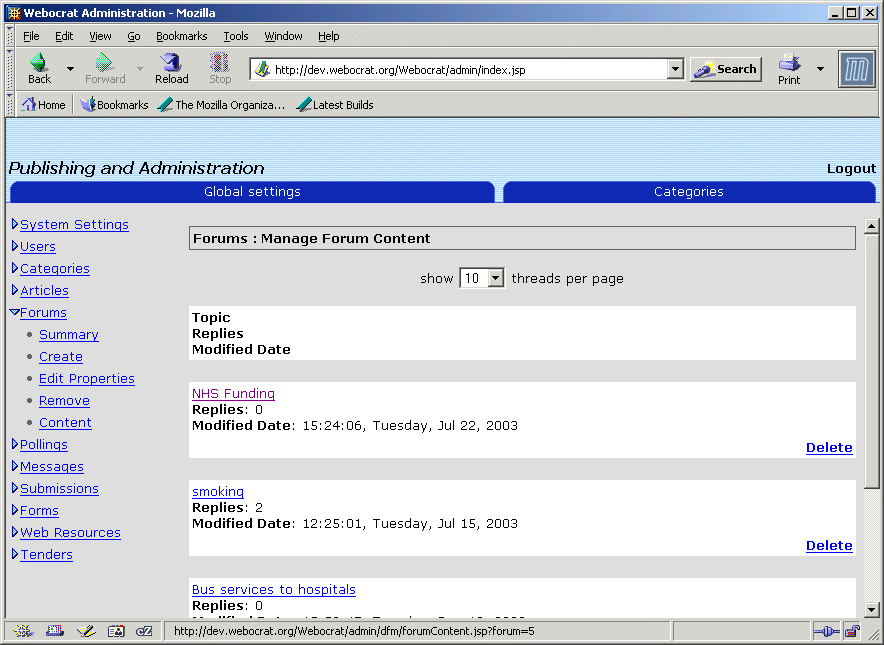
(c) The forum content page is displayed showing the threads for that particular forum. The threads topic name, the number of replies and the date it was last modified are displayed. Click on the topic name to obtain a full description.
(d) If you wish to delete a thread click on .
.
(a) Click on the Forums link (see Figure 3.1).
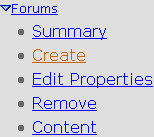
(b) Click on the Create Link (see Figure 8.5).
(c) The create forum page is displayed. To create a forum enter the following information: Forum Name and Forum Description. From the Moderated drop down menu select from: Unmoderated, Moderate Threads, Moderate All Messages.
(d) When all the above information has been entered click on . If you no longer require to
create a forum click on
  .
.
(e) The forum has now got to be linked to the Ontology. Go to Section 17.
8.3 Remove (Go to Section 15)
8.4 Edit Properties (Go to Section 16)

9. POLLINGS
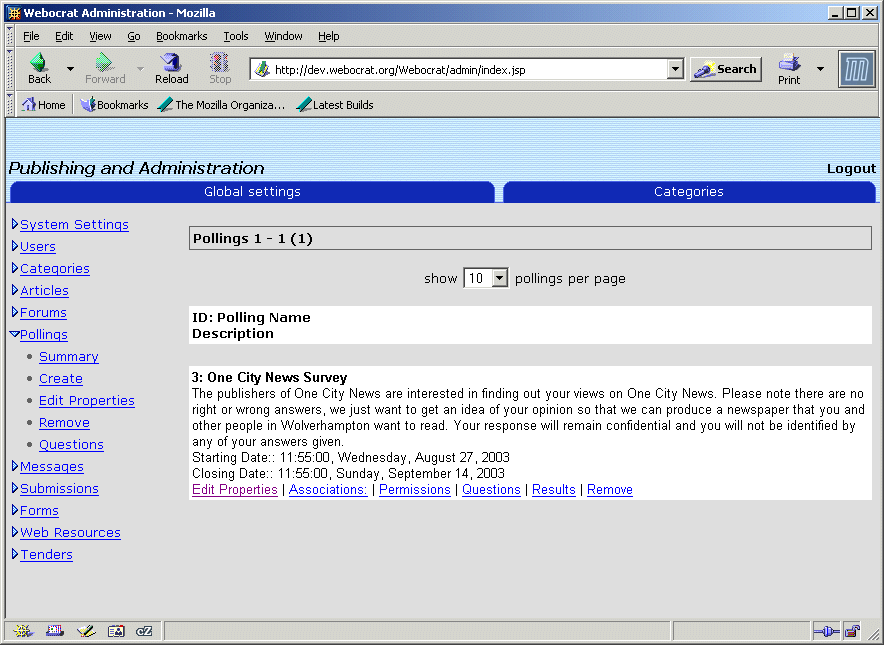
(a) Click on the Pollings link or tab. If logged on as the system administrator the Pollings summary page is displayed as in Figure 9.1 but the layout of the system publisher page is slightly different (see Figure 2.6)
9.1 Pollings Summary
The Pollings summary page displays the Polling Name and a Description.
9.1.1 Questions
The Questions link can be located in two ways:
(a) Click on the Questions link (see Figure 9.2) and select the Question you wish to Edit.
(b) Alternatively, below the Polling Name and Description on the Polling Summary page are links. Click on the Questions link (see Figure 9.3).

Create a New Question
(c) To create a new question click on .
.
(d) Enter the Question, Answers and choose the Type. The types are: yes/no, one predefined answer, many predefined answers and informal question.
(e) Click on .
.
Edit Question Properties
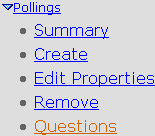
(f) To edit a question which has already been created click on the Edit Properties link in the same row as the questions Answers (see Figure 9.4).

(g) Make the necessary amendments and click on .
.
Remove a Question
(h) To remove a question from a poll click on the Remove link (see Figure 9.5).

(d) Click on .
.
9.1.2 Results
(a) To view the results of a polling click on the Results link (see Figure 9.6).

9.1.3 Remove a Polling (Go to Section 15)
9.1.4 Edit Properties (Go to Section 16)
9.1.5 Association (Go to Section 17)
9.1.6 Permissions (Go to Section 18)
9.2 Create a Polling
(a) Click on the Pollings link (see Figure 3.1).
(b) Click on the Create link (see Figure 9.7).

(c) The Create Polling page is displayed. To create a polling enter the following information: Polling Name, Polling Description, Starting Date and Closing Date (Optional).
(d) When all the above information has been entered click on .
.
(e) If you no longer require to create a polling click on .
.
(f) Go to Section 17.

10. MESSAGES
(a) Click on the Messages link or tab. If logged on as the system administrator the Messages summary page is displayed as in Figure 10.1 but the layout of the system publisher page is slightly different (see Figure 2.6)
10.1 Messages Summary
The summary page contains the Message Headline and a Description.
10.1.1 Remove
(a) Located on the Messages summary page below the message description is a Remove link (see Figure 10.2). Click on this if you wish to remove a Message.

10.2 Send a Message
(a) Click on the Messages link (see Figure 3.1).
(b) To send a message click on the Send link (see Figure 10.3).

(c) The Send message page is displayed. Enter the following information: Message headline, Message Text (Optional) and choose the Recipients from the list provided.
(d) Once all the above information has been entered click on .
.
(e) If you no longer wish to send a message click on .
.

11. SUBMISSIONS
(a) Click on the Submissions link or tab. If logged on as the system administrator the Submissions summary page is displayed as in Figure 11.1 but the layout of the system publisher page is slightly different (see Figure 2.6).
11.1 Submissions Summary
The submissions summary page is displayed <include here what detail is included about each submission. >
11.2 Remove
(a) Click on the Submissions link.
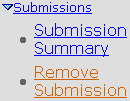
(b) Click on the Remove link (see Figure 11.2).
(c) < Add more information here if it is different from Section 15 >

12. FORMS
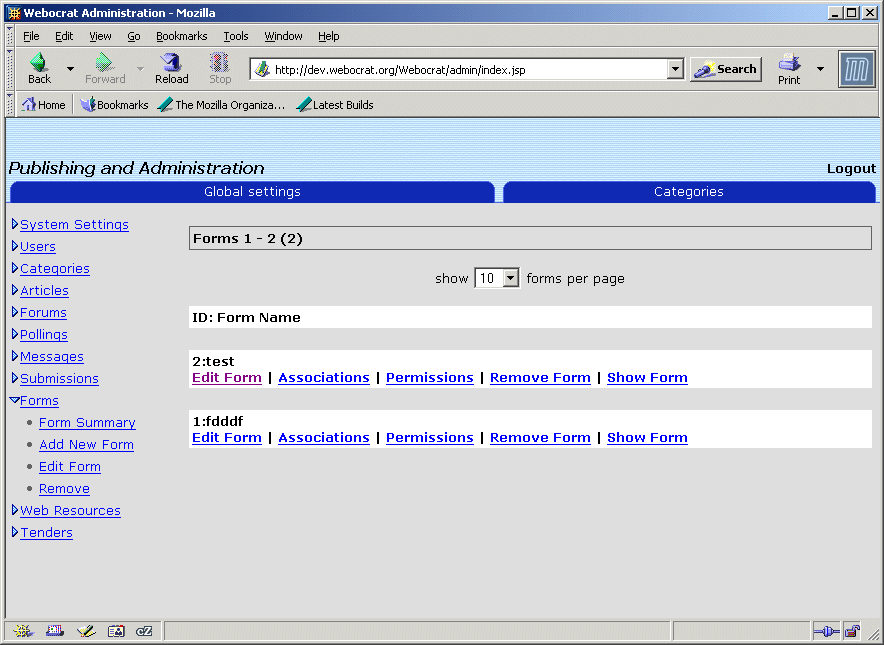
(a) Click on the Forms link if logged on as the system administrator the summary page is displayed in Figure 12.1. If logged on as the system publisher the form link can be located from the Submissions tab and the layout of the page is slightly different from Figure 12.2 (see Figure 2.6).
12.1 Forms Summary
12.1.1 Show Form
(a) To view a form click on link from the form
summary page.
12.1.2 Remove (Go to Section 15).
12.1.3 Edit Form (Go to Section 16).
12.1.4 Associations (Go to Section 17).
12.1.5 Permissions (Go to Section 18).
12.2 Create a New Form
(a) Click on the Forms link (see Figure 3.1).
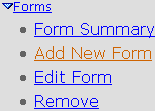
(b) Click on the Add New Form link (see Figure 12.2).
(c) To add a new form enter the following information: Form Name, Form Description and Form Template.
(d) Click on .
.
(e) Go to Section 17.

13. WEB RESOURCES
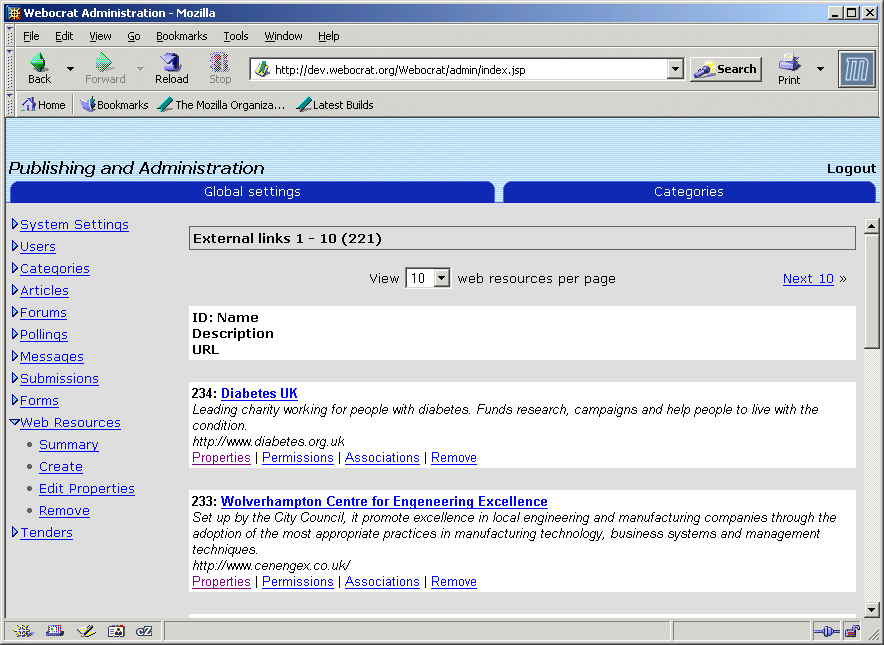
(a) Click on the Web Resources link or tab. If logged on as the system administrator the Web Resources summary page is displayed as in Figure 13.1 but the layout of the system publisher page is slightly different (see Figure 2.6).
13.1 Web Resources Summary
13.1.1 Remove (Go to Section 15)
13.1.2 Properties (Go to Section 16)
13.1.3 Associations (Go to Section 17)
13.1.4 Permissions (Go to Section 18)
13.2 Create
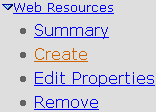
(a) To create a Web Resource click on the Create link (see Figure 13.2).
(b) The information required when creating a web resource is: Name (title), URL, Mime/Type and Description. Once this has been entered click on .
.
(c) Go to Section 17.

14. TENDERS
14.1 Tenders Summary
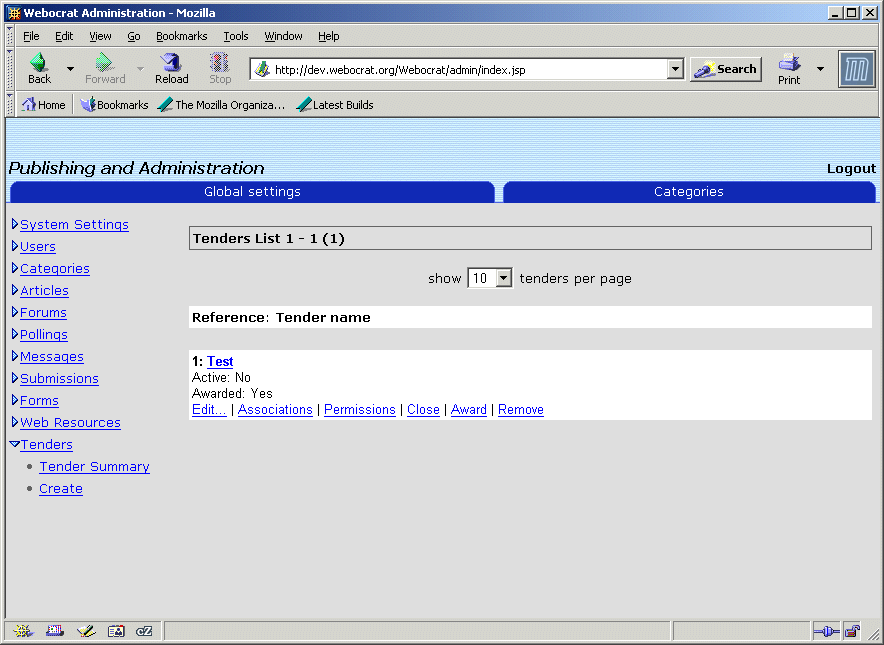
(a) Click on the Tenders link or tab. If logged on as the system administrator the Web Resources summary page is displayed as in Figure 14.1 but the layout of the system publisher page is slightly different (see Figure 2.6).
14.1.1 Award
(a) Once the Tender has been awarded these details have to be entered into the system. Below each Tender name is an Award link (see Figure 14.2). Click on this.

(b) A page is displayed where the details regarding the Award can be entered. Enter these details in the input box and click on .
.
14.1.2 Close
(a) When the Tender close date has been reached click on the Close link (see Figure 14.3).

(b) A page is displayed asking if you are sure that you wish to close this Tender. If so, click on . And if not, click on
  .
.
14.1.1 Remove (Go to Section 15)
14.1.2 Edit (Go to Section 16)
14.1.3 Associations (Go to Section 17)
14.1.4 Permissions (Go to Section 18)
14.2 Create
(a) Click on the Tenders link (see Figure 3.1).
(b) Click on the Create link (see Figure 14.4).

(c) To create a Tender the following information needs to be entered: Title, reference Number, Deadline Date, Person to Contact, Contact Email, Contact Telephone, Tender Summary, Document Name, Location of Document, Document Type.
(d) When all the above information has been entered click on .
.
(e) Go to Section 17.

(b) For Forums and Submissions click on the Remove link (see Figure 15.1). Go to step 15(d).

(c) Alternatively for Users, Categories, Articles, Polling, Messages, Forms, Web Resources and Tenders there is also another method. For example if you wanted to remove a particular Article, click on the Articles link (see Figure 3.1) and a summary of the Articles will be displayed. Below each Article description is a link labelled Remove (see Figure 15.2) click on this. Go to step 15(g).

(d) If in step (b) the Forums link was selected the Remove page is now displayed which contains a list box. Click on the of the list box (see Figure 15.3).

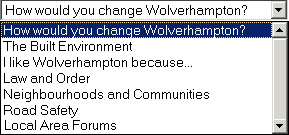
(e) A list should appear (see Figure 15.4) that lists all the Forums (or Articles, Categories, Pollings, Forms, Web Resources, Tenders) content. From the list click on the item that needs to removed.
(f) Click on .
.
(g) The Remove page is displayed. Make the necessary changes and click on . If the item no longer needs to be
updated click on
  .
.

16. EDIT PROPERTIES: CATEGORIES, ARTICLES, FORUMS, POLLINGS, FORMS, WEB RESOURCES OR TENDERS.
(a) Click on one of the links from the list down the left hand side of the screen that needs to be edited (see Figure 3.1).
(b) For Forums and Tenders click on the Edit Properties link (see Figure 16.1). Go to step 16(d).

(c) Alternatively for Categories, Articles, Pollings, Forms and Web Resources there is also another method. For example if you wanted to edit the properties of a particular Article, click on the Articles link (see Figure 3.1) and a summary of the Articles will be displayed. Below each Article description is a link labelled Properties (see Figure 16.2) click on this. Go to step 16(g).

(d) The Edit Properties page is displayed which contains a list box. Click on of the list box (see Figure 15.3).
(e) A list should appear (see Figure 15.4) that lists all the Categories (or Articles, Forums, Pollings, Forms, Web Resources, Tenders). From the list click on the item that needs to edited.
 . If the item no longer needs to be
updated click on
  .
.
The Articles and Categories link contains a Text Editor (see Figure 16.3) where for example the font and the size can be changed. The Text editor also allows the text to be seen in HTML Source view if you click on .
.


17. ASSOCIATIONS: CATEGORIES, ARTICLES, POLLINGS, FORMS, WEB RESOURCES AND TENDERS
The content for the Categories, Articles, Pollings, Forms, Web Resources and Tenders have to be linked to the Ontology via associations. For example, click on the Articles link (see Figure 3.1).
(a) Below each Articles description is a link labelled Associations (see Figure 17.1) click on this.

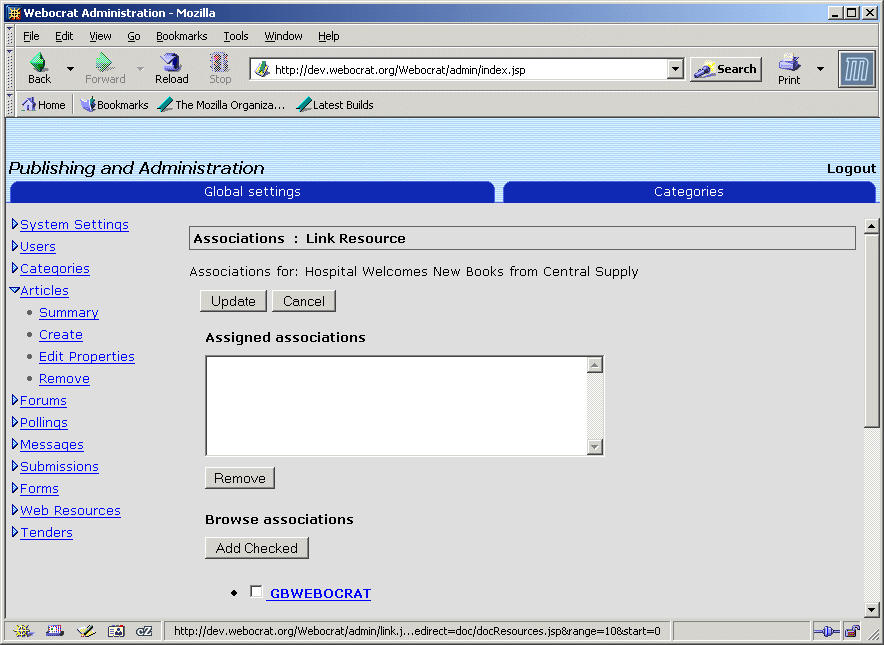
(b) The Associations Link Resource page is displayed.
(c) If there are any Associations that have already been assigned then these will be displayed in the Assigned Associations box. If any of the assigned associations need to be removed, click on this association in the Assigned Association box and click on .
.
(d) To assign an Association navigate to the link shown in Figure 17.3.

The link headings highlighted in blue can be clicked on to obtain further associations. Once the associations required have been decided on click on the check box to the left of the
Association heading. Once clicked on it should look like
  .
.
(e) Click on .
.
(f) If you are already aware of the Association required type this into the input box (see Figure 17.4) below the Find associations according to name heading and click on .
.

(g) The results from the search are displayed in the Search Results box. Click on the Association required and click on . If all the Associations from the
search are required click on
  .
.
(h) Whenever any changes have been made always click on .
.

18. PERMISSIONS: ARTICLES, POLLINGS, FORMS, WEB RESOURCES AND TENDERS
For certain items in the system their is a restriction regarding who can see what. This is assigned via the Permissions link.
(a) Permission applies to Articles, Pollings, Forms, Web Resources and Tenders, click on anyone of these links (see Figure 3.1).
(b) The summary page is displayed which contains a link labelled as Permissions (see Figure 18.1). Click on this link.

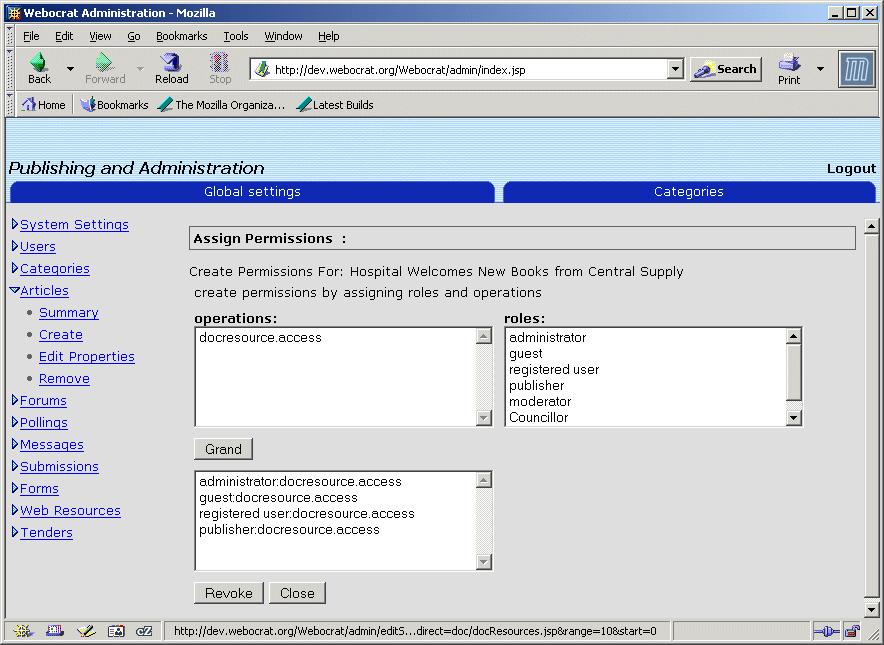
(c) The Assign Permissions page is displayed (see Figure 18.2).
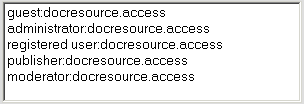
Click on the Operation and the Role you want to assign. For example, Figure 18.3 shows the Permissions for an Article..
(d) When the Roles and the Operations have been highlighted click on . < Should be GRANT >
(e) If any of the assigned permissions is no longer required highlight this permission and click on .
.
(f) Click on .
.

19. LOGOUT
When you have finished making all the updates click on .
.

(e) Click on
 .
.The system administration homepage is displayed (see Figure 2.4).
The discussion forum moderator homepage is displayed in Figure 2.5. The discussion forum topics are displayed.
The system publisher homepage is displayed in Figure 2.6.
Figure 2.4 Administration homepage
Across the top of the homepage are two tabs labelled as: Global Settings and Categories. The homepage automatically displays the Global Settings folder.
The Global Settings tab contains eleven main category links which are displayed down the left hand side of the homepage and are labelled as: System Settings, Users, Categories, Articles, Forums, Pollings, Messages, Submissions, Forms, Web Resources and Tenders.
The Categories tab (across the top of the homepage) and the Categories link (down the left hand side of the homepage) display identical information.
Figure 2.5 Discussion forum moderator
homepage
Across the top of the publisher homepage are seven tabs labelled as: Articles, Forums, Pollings, Messaging, Submissions, Web Links and Tenders.
Figure 2.6 System Publisher homepage
Sections 3, 5 and 6 apply to the system administrator only.

3. SYSTEM SETTINGS (SYSTEM ADMINISTRATOR)
(a) If not already displayed click on the Global Settings tab.
(b) Click on System Settings (see Figure 3.1).
Figure 3.1 System Settings link selected
3.1 Database Information
(a) Click on the Database Info link (see Figure 3.2) (unless it is already displayed).

Figure 3.2 Database Info link selected
The Database Info page holds information about the database consisting of its properties (Name and Version), the JDBC Driver Properties (Driver, Connection, URL and Connection username) and the database capabilities.

3.2 Search Settings
(a) Click on the System Settings link.
(b) Click on the Search Settings link (see Figure 3.3).

Figure 3.3 Search Settings link selected
The Search Settings page adds new resources into the searchable resource database. How often this takes place can be controlled by adjusting the refresh interval and clicking on the UPDATE button.

3.3 Ontology Settings
(a) Click on the System Settings link.
(b) Click on the Ontology Settings link (see Figure 3.4).

Figure 3.4 Ontology Settings link selected
The Ontology Settings page controls how often the ontology reloads from the ontology server. This can be controlled by adjusting the refresh interval and clicking on UPDATE.
To reload the ontology from the server click on
 .
.
3.4 Association Statistics
(a) Click on the System Settings link.
(b) Click on the Association Statistics link (see Figure 3.5).

Figure 3.5 Association Statistics link
selected
This shows all the themes and indicates the number of documents linked to each theme.

3.5 Watch Dog
(a) Click on the Systems Settings link.
(b) Click on the Watch Dog link (see Figure 3.6).

Figure 3.6 Watch Dog link selected
This is responsible for updating the submission processing states and handles any new replies.

4. LISTING THE ITEMS OPTION
When clicking on the Users, Categories, Articles, Forums, Pollings, Messages, Forms, Web Resources or Tenders link there is an option available (see Figure 4.1) which allows you to decide how many User's for example can be viewed per page.

Figure 4.1 Icon to select how many users
can be viewed per page
(a) Click on
 and a list becomes
available (see Figure 4.2). This comprises of a list of options, which
allows you to decide how many items (i.e. Users, Categories, Articles,
Forums, Pollings, Messages, Forms, Web Resources and Tenders) can be
viewed per page. The options available are: 10, 20, 30 and 50.
Figure 4.2 List to select how many items
can be viewed per page
(b) Click on the preferred number.
(c) Also on the right hand side of the screen there is a link labelled Next (see Figure 4.3). Click on this to view other items on the next page. Likewise when on the next page to go back to the previous page click on the Previous link (see Figure 4.4).

Figure 4.3 Link to view other User's

Figure 4.4 Link to view Previous User's

5. USERS (SYSTEM ADMINISTRATOR)
(a) Click on the Users link (see Figure 3.1). The User Summary page is displayed (see Figure 5.1).
Figure 5.1 User Summary page
5.1 User Summary
The User Summary page displays the User's ID, Name and their Email address. The summary page also contains two links: Roles and Remove, which are explained in more detail in this section.
5.1.1 Assign/Delete User Roles
If you click on the Roles link below the users email address (see Figure 5.2) a page containing the roles for that particular user are shown. Displayed on this page are two boxes labelled as: Roles and Assigned Roles (see Figure 5.3).

Figure 5.2 Roles for a user
Figure 5.3 User Roles page
The roles are: Administrator, Guest, Registered User, Publisher and Moderator.
If you wish to assign a new role for a particular user click on the desired role in the Roles box and click on
 .
.If you wish to delete a role from a user click on the role you wish to delete in the Assigned Roles box and click on
 .
.When the roles have been assigned correctly click on
 .
.
5.2 Change a Password
(a) Click on the Users link (see Figure 3.1).
(b) Click on the Passwords link (see Figure 5.4).

Figure 5.4 Password link selected
The Change Password page is displayed and this is where the passwords can be changed.
(c) Enter the required information: admin password (i.e. current password), username of person to change, new password, and confirm new password in the appropriate input boxes.
(d) When all the above details have been entered click on
 .
.
5.3 Create a User
(a) Click on the Users link (see Figure 3.1).
(b) Click on the Create User link (see Figure 5.5).

Figure 5.5 Create User link selected
The page to create a user is displayed. Enter the following information in the relevant input boxes: First Name (optional), Last Name (optional), Email, Username and Password (to be entered two times).
(d) The username entered can be the email address entered. If this is the case click in the use email box
 else leave it blank.
(e) When all the above information has been entered click on
 .
.(f) If the password no longer needs to be changed click on
 .
.(g) When a User is created the roles Registered User and Guest are automatically assigned. To change these or add new roles go to Section 5.1.1.

5.4 View/Create Roles
(a) Click on the Users link (see Figure 3.1).
(b) Click on the Roles link (see Figure 5.6).

Figure 5.6 Roles link selected
A list of the Roles is displayed consisting of the Roles Name and a Description.
(c) To create a role click on
 .
.(d) The create roles page is displayed, here enter the new roles information in the relevant input boxes: Name and Description.
(e) When the above information has been entered click on
 .
.(f) If the role no longer needs to be created click on
 .
.
6. CATEGORIES (SYSTEM ADMINISTRATOR)
(a) Click on the Categories tab. Or click on the Categories link from the Global Settings tab (see Figure 3.1). The Web Categories page is displayed (see Figure 6.1).
Figure 6.1 Web Categories page displayed
The Web Categories page is displayed showing the Category name and below the name are three links: Properties, Associations and Remove.
6.1 Category Summary
When the Categories link or tab is selected the Category Summary page is displayed.
6.1.1 Remove (Go to Section 15)
6.1.2 Properties (Go to Section 16)
6.1.3 Association (Go to Section 17)
6.2 Create
(a) Click on the Categories link (see Figure 3.1).
(b) Click on the Create link (see Figure 6.2).

Figure 6.2 Create link selected
(c) The create category page is displayed (see Figure 6.3). To create a Category enter the following information: Category Name and the Category Description (optional). Above the Category Description input box is a text editor where the text style can be changed.
Figure 6.3 Create category page
(d) Scroll down the page to the Choose Categories section. Decide which categories require to be added as a Parent and which ones as a Child.
(e) Once decided about the Parent and Child categories click on the category name. Depending on whether you want to add the category as a parent/child click on
 or
or  .
.(f) If a parent or child needs to be removed from a category below the category description box are two more boxes. Click on the Parent or Child category that needs to be removed then click on
 .
. 
7. ARTICLES
(a) Click on the Articles link or tab. If logged on as the system administrator the Articles summary page is displayed as in Figure 7.1 but the layout of the system publisher page is slightly different (see Figure 2.6).
Figure 7.1 Articles summary page
7.1
Articles SummaryThe Articles summary page shows the Article Title, Subtitle and Leadin.
7.1.1 Remove (Go to Section 15)
7.1.2 Properties (Go to Section 16)
7.1.3 Association (Go to Section 17)
7.1.4 Permission (Go to Section 18)
7.2 Create
(a) Click on the Articles link or tab.
(b) Click on the Create link (see Figure 7.2).

Figure 7.2 Create Article link selected
(c) The Articles Create page is displayed. To create an Article the information that needs to be entered is: Title, Subtitle, Picturefile, Leadin, Article Body and Attachment file. The information for the items with an asterisk by their side must be entered.
Next to the Picturefile input box
is a Browse icon. To insert an image click on the browse icon and locate
to where the picture is then click on open.
If there are files you wish to attach to the article click on browse next to the attachementfile input box. Locate to where the file is and click on open.
Enter the above information.
(d) When all the above information has been entered click on
 .
.(e) If you no longer need to create an Article click on
 .
.(f) The Associations Link Resource page is now displayed. Go to Section 17.
(g) For Permissions go to Section 18.

8. FORUMS
(a) Click on the Forums link or tab. If logged on as the system administrator the Forums summary page is displayed as in Figure 8.1 but the layout of the system publisher and the discussion forum moderator pages are slightly different (see Figure 2.5).
Figure 8.1 Forums Summary Page
8.1 Forums Summary
The forum is where discussions on related topics take place. The Forum Summary page displays the Forum Name, Threads/Messages and the Description.
8.1.1 Content
(a) To view the content of a Forum click on the Content link below the forum you require from the Summary page (see Figure 8.2).

Figure 8.2 Content link
(b) Alternatively, click on the Content link (see Figure 8.3). Click on
 and select the forum you require
from the drop down menu list. Click on
  .
.
Figure 8.3 Content link
(c) The forum content page is displayed showing the threads for that particular forum. The threads topic name, the number of replies and the date it was last modified are displayed. Click on the topic name to obtain a full description.
Figure 8.4 Forum Content page
(d) If you wish to delete a thread click on
 .
.(a) Click on the Forums link (see Figure 3.1).
(b) Click on the Create Link (see Figure 8.5).

Figure 8.5 Create forum link selected
(c) The create forum page is displayed. To create a forum enter the following information: Forum Name and Forum Description. From the Moderated drop down menu select from: Unmoderated, Moderate Threads, Moderate All Messages.
(d) When all the above information has been entered click on
 . If you no longer require to
create a forum click on
  .
.(e) The forum has now got to be linked to the Ontology. Go to Section 17.
8.3 Remove (Go to Section 15)
8.4 Edit Properties (Go to Section 16)

9. POLLINGS
(a) Click on the Pollings link or tab. If logged on as the system administrator the Pollings summary page is displayed as in Figure 9.1 but the layout of the system publisher page is slightly different (see Figure 2.6)
Figure 9.1 Pollings summary page
9.1 Pollings Summary
The Pollings summary page displays the Polling Name and a Description.
9.1.1 Questions
The Questions link can be located in two ways:
(a) Click on the Questions link (see Figure 9.2) and select the Question you wish to Edit.
(b) Alternatively, below the Polling Name and Description on the Polling Summary page are links. Click on the Questions link (see Figure 9.3).

Figure 9.2 Question link selected

Figure 9.3 Question link selected
Create a New Question
(c) To create a new question click on
 .
.(d) Enter the Question, Answers and choose the Type. The types are: yes/no, one predefined answer, many predefined answers and informal question.
(e) Click on
 .
.Edit Question Properties
(f) To edit a question which has already been created click on the Edit Properties link in the same row as the questions Answers (see Figure 9.4).

Figure 9.4 Edit Question Properties link
(g) Make the necessary amendments and click on
 .
.Remove a Question
(h) To remove a question from a poll click on the Remove link (see Figure 9.5).

Figure 9.5 Remove Question link
(d) Click on
 .
.9.1.2 Results
(a) To view the results of a polling click on the Results link (see Figure 9.6).

Figure 9.6 Polling Results link
9.1.3 Remove a Polling (Go to Section 15)
9.1.4 Edit Properties (Go to Section 16)
9.1.5 Association (Go to Section 17)
9.1.6 Permissions (Go to Section 18)
9.2 Create a Polling
(a) Click on the Pollings link (see Figure 3.1).
(b) Click on the Create link (see Figure 9.7).

Figure 9.7 Create link selected
(c) The Create Polling page is displayed. To create a polling enter the following information: Polling Name, Polling Description, Starting Date and Closing Date (Optional).
(d) When all the above information has been entered click on
 .
.(e) If you no longer require to create a polling click on
 .
.(f) Go to Section 17.

10. MESSAGES
(a) Click on the Messages link or tab. If logged on as the system administrator the Messages summary page is displayed as in Figure 10.1 but the layout of the system publisher page is slightly different (see Figure 2.6)
Figure
10.1 Messages Summary page
10.1 Messages Summary
The summary page contains the Message Headline and a Description.
10.1.1 Remove
(a) Located on the Messages summary page below the message description is a Remove link (see Figure 10.2). Click on this if you wish to remove a Message.

Figure 10.2 Remove message link
10.2 Send a Message
(a) Click on the Messages link (see Figure 3.1).
(b) To send a message click on the Send link (see Figure 10.3).

Figure 10.3 Send message link selected
(c) The Send message page is displayed. Enter the following information: Message headline, Message Text (Optional) and choose the Recipients from the list provided.
(d) Once all the above information has been entered click on
 .
.(e) If you no longer wish to send a message click on
 .
.
11. SUBMISSIONS
(a) Click on the Submissions link or tab. If logged on as the system administrator the Submissions summary page is displayed as in Figure 11.1 but the layout of the system publisher page is slightly different (see Figure 2.6).
< Add Summary page image when
summaries have been added possibly >
Figure 11.1 Submissions summary page
11.1 Submissions Summary
The submissions summary page is displayed <include here what detail is included about each submission. >
11.2 Remove
(a) Click on the Submissions link.
(b) Click on the Remove link (see Figure 11.2).

Figure 11.2 Remove Submission link selected
(c) < Add more information here if it is different from Section 15 >

12. FORMS
(a) Click on the Forms link if logged on as the system administrator the summary page is displayed in Figure 12.1. If logged on as the system publisher the form link can be located from the Submissions tab and the layout of the page is slightly different from Figure 12.2 (see Figure 2.6).
Figure 12.1 Form Summary page
12.1 Forms Summary
12.1.1 Show Form
(a) To view a form click on
 link from the form
summary page.
link from the form
summary page.12.1.2 Remove (Go to Section 15).
12.1.3 Edit Form (Go to Section 16).
12.1.4 Associations (Go to Section 17).
12.1.5 Permissions (Go to Section 18).
12.2 Create a New Form
(a) Click on the Forms link (see Figure 3.1).
(b) Click on the Add New Form link (see Figure 12.2).

Figure 12.2 Add New Form link selected
(c) To add a new form enter the following information: Form Name, Form Description and Form Template.
(d) Click on
 .
.(e) Go to Section 17.

13. WEB RESOURCES
(a) Click on the Web Resources link or tab. If logged on as the system administrator the Web Resources summary page is displayed as in Figure 13.1 but the layout of the system publisher page is slightly different (see Figure 2.6).
Figure 13.1 Web Resources summary page
13.1 Web Resources Summary
13.1.1 Remove (Go to Section 15)
13.1.2 Properties (Go to Section 16)
13.1.3 Associations (Go to Section 17)
13.1.4 Permissions (Go to Section 18)
13.2 Create
(a) To create a Web Resource click on the Create link (see Figure 13.2).

Figure 13.2 Create link selected
(b) The information required when creating a web resource is: Name (title), URL, Mime/Type and Description. Once this has been entered click on
 .
.(c) Go to Section 17.

14. TENDERS
14.1 Tenders Summary
(a) Click on the Tenders link or tab. If logged on as the system administrator the Web Resources summary page is displayed as in Figure 14.1 but the layout of the system publisher page is slightly different (see Figure 2.6).
Figure 14.1 Tenders summary page
14.1.1 Award
(a) Once the Tender has been awarded these details have to be entered into the system. Below each Tender name is an Award link (see Figure 14.2). Click on this.

Figure 14.2 Tenders Award link
(b) A page is displayed where the details regarding the Award can be entered. Enter these details in the input box and click on
 .
.14.1.2 Close
(a) When the Tender close date has been reached click on the Close link (see Figure 14.3).

Figure 14.3 Tender close link
(b) A page is displayed asking if you are sure that you wish to close this Tender. If so, click on
 . And if not, click on
  .
.14.1.1 Remove (Go to Section 15)
14.1.2 Edit (Go to Section 16)
14.1.3 Associations (Go to Section 17)
14.1.4 Permissions (Go to Section 18)
14.2 Create
(a) Click on the Tenders link (see Figure 3.1).
(b) Click on the Create link (see Figure 14.4).

Figure 14.4 Create Tender link selected
(c) To create a Tender the following information needs to be entered: Title, reference Number, Deadline Date, Person to Contact, Contact Email, Contact Telephone, Tender Summary, Document Name, Location of Document, Document Type.
(d) When all the above information has been entered click on
 .
.(e) Go to Section 17.

15. REMOVE: USERS, CATEGORIES, ARTICLES, FORUMS,
POLLINGS, FORMS, WEB RESOURCES OR TENDERS
(a) Click on one of the links from the list down the left hand side of the screen that needs to be removed (see Figure 3.1).
(a) Click on one of the links from the list down the left hand side of the screen that needs to be removed (see Figure 3.1).
(b) For Forums and Submissions click on the Remove link (see Figure 15.1). Go to step 15(d).

Figure 15.1 Remove link selected
(c) Alternatively for Users, Categories, Articles, Polling, Messages, Forms, Web Resources and Tenders there is also another method. For example if you wanted to remove a particular Article, click on the Articles link (see Figure 3.1) and a summary of the Articles will be displayed. Below each Article description is a link labelled Remove (see Figure 15.2) click on this. Go to step 15(g).

Figure 15.2 Alternative way to select
Remove link
(d) If in step (b) the Forums link was selected the Remove page is now displayed which contains a list box. Click on the
 of the list box (see Figure 15.3).
Figure 15.3 List box
(e) A list should appear (see Figure 15.4) that lists all the Forums (or Articles, Categories, Pollings, Forms, Web Resources, Tenders) content. From the list click on the item that needs to removed.

Figure 15.4 List showing all the Content
(f) Click on
 .
.(g) The Remove page is displayed. Make the necessary changes and click on
 . If the item no longer needs to be
updated click on
  .
.
16. EDIT PROPERTIES: CATEGORIES, ARTICLES, FORUMS, POLLINGS, FORMS, WEB RESOURCES OR TENDERS.
(a) Click on one of the links from the list down the left hand side of the screen that needs to be edited (see Figure 3.1).
(b) For Forums and Tenders click on the Edit Properties link (see Figure 16.1). Go to step 16(d).

Figure 16.1 Edit Properties link selected
(c) Alternatively for Categories, Articles, Pollings, Forms and Web Resources there is also another method. For example if you wanted to edit the properties of a particular Article, click on the Articles link (see Figure 3.1) and a summary of the Articles will be displayed. Below each Article description is a link labelled Properties (see Figure 16.2) click on this. Go to step 16(g).

Figure 16.2 Alternative way to select Edit
Properties link
(d) The Edit Properties page is displayed which contains a list box. Click on
 of the list box (see Figure 15.3).
(e) A list should appear (see Figure 15.4) that lists all the Categories (or Articles, Forums, Pollings, Forms, Web Resources, Tenders). From the list click on the item that needs to edited.
(f) Click on  .
.
(g) The Edit Properties page is displayed. Make the necessary changes
and click on  .
. . If the item no longer needs to be
updated click on
  .
.The Articles and Categories link contains a Text Editor (see Figure 16.3) where for example the font and the size can be changed. The Text editor also allows the text to be seen in HTML Source view if you click on
 .
.
Figure 16.3 Text editor

17. ASSOCIATIONS: CATEGORIES, ARTICLES, POLLINGS, FORMS, WEB RESOURCES AND TENDERS
The content for the Categories, Articles, Pollings, Forms, Web Resources and Tenders have to be linked to the Ontology via associations. For example, click on the Articles link (see Figure 3.1).
(a) Below each Articles description is a link labelled Associations (see Figure 17.1) click on this.

Figure 17.1 Associations link selected
(b) The Associations Link Resource page is displayed.
Figure 17.2 Association Link Resource page
(c) If there are any Associations that have already been assigned then these will be displayed in the Assigned Associations box. If any of the assigned associations need to be removed, click on this association in the Assigned Association box and click on
 .
.(d) To assign an Association navigate to the link shown in Figure 17.3.

Figure 17.3 Browse Associations
The link headings highlighted in blue can be clicked on to obtain further associations. Once the associations required have been decided on click on the check box
 to the left of the
Association heading. Once clicked on it should look like
  .
.(e) Click on
 .
.(f) If you are already aware of the Association required type this into the input box (see Figure 17.4) below the Find associations according to name heading and click on
 .
.
Figure 17.4 Input box to find Association
Required
(g) The results from the search are displayed in the Search Results box. Click on the Association required and click on
 . If all the Associations from the
search are required click on
  .
.(h) Whenever any changes have been made always click on
 .
.
18. PERMISSIONS: ARTICLES, POLLINGS, FORMS, WEB RESOURCES AND TENDERS
For certain items in the system their is a restriction regarding who can see what. This is assigned via the Permissions link.
(a) Permission applies to Articles, Pollings, Forms, Web Resources and Tenders, click on anyone of these links (see Figure 3.1).
(b) The summary page is displayed which contains a link labelled as Permissions (see Figure 18.1). Click on this link.

Figure 18.1 Permission link
(c) The Assign Permissions page is displayed (see Figure 18.2).
Figure 18.2 Assign Permissions page
Click on the Operation and the Role you want to assign. For example, Figure 18.3 shows the Permissions for an Article..

Figure 18.3 Permissions for Articles
(d) When the Roles and the Operations have been highlighted click on
 . < Should be GRANT >
(e) If any of the assigned permissions is no longer required highlight this permission and click on
 .
.(f) Click on
 .
.
19. LOGOUT
When you have finished making all the updates click on
 .
. 
